SeascapePhotography Guide
Practical Tips to Seascape Photography Guide
Let’s talk about Seascape photography and how to plan a session on the coast. It is well known that when one takes their first steps in photography, the technique that can attract more is the long exposure. With it, you can get those precious silks in flowing water or make a body of water appear calm.
We could say that this, taken to its maximum expression, will be found in rivers and beaches. It is really on the last that I want to focus on and put in writing all the knowledge and techniques that I have been acquiring during these years. Being my main location the Asturian coast and putting all this into practice around the world.
To begin with, and as I have said before, we will focus on the seacoast. Most of what I will tell you below will serve anywhere in the world.
Plan your Shooting of the Seascapes
In the first place, when we propose to take a photograph of the coast, seascape, any type of beach or cliff, the first thing we have to take into account is planning. As in any other photo, but perhaps in this discipline even more so. Why? Very simple, due to the tides. Thanks to them we can see or stop seeing certain landmarks that we want to photograph. It will make a cliff have a look that we do not like or simply prevent us from accessing or perhaps leaving our location.
Seascapes Tides
How do we control the tides?
First of all, we must be clear about the place we want to go to. If we have already seen other photos from other authors of this place, ask them. Knowing the day they accessed is enough. Some will not answer you, and others will be willing to go with you as has happened to me on many occasions.
If, on the other hand, we are intrepid adventurers and we believe that we are facing a new place (Just because we have not seen a photo on Instagram), surely a fisherman or a local has already gone down there. By taking a walk during the day through the nearby town, chatting with the locals in the bars, and asking questions, we will have the information that we need to access.
Once we are clear about the access and the tide, if it is a known site, we will use a tide table. Both in web browsers and applications for Android or iOS, you can find all this information. Personally, I use the following:
If, on the other hand, we have to recognize the place that we still do not know. I recommend that before going, you visit the closest port because there may not be internet coverage in the place. My advice is that in each step and in the final location, the maximum tides are controlled, and with what measurements can be accessed and exited.
Types of tides
Now we will talk about tides and differentiate them a bit. As you all know, these are cyclical and the high tides (high) and low tides (low). It happens approximately 6 hours between a high tide and a low tide. Well, from now on it must be clear that not all the lows leave all the beaches and access points clear, nor all the highs reach the middle of a cliff face. There are spring tides and neap tides, and they are very easy. to distinguish thanks to the applications.
The spring tide is one that has a great oscillation between its high tide and its low tide. With a long difference in meters of measurement between its highest point and its lowest point. The neap tide is one that hardly experiences an oscillation between its high tide and its low tide, existing between its lowest and highest points.
That this data does not mislead us, as it has happened with people to whom I have explained this data. A spring tide is not synonymous with strong waves, nor is a neap tide synonymous with a calm sea. This depends on other factors such as wind, storms…
A small “tip” before continuing. When they provide you with the information of the tide with which a person has accessed that place, if it provides you with the height of it, ask what measurement method they use for your query, since they exist different methods and this can vary significantly from one to another, leading to a frustrated or risky session.
Planning
Well, we already have the place where we want to go. I would like to ignore that we have made a planning that we look for in that place. If a sunset, dawn, some storm clouds, and at the same time, we have verified that the meteorology accompanies or at least the forecast is good for our ultimate goal.
As a reminder, I leave you the applications that I use for all my sessions. Check our post about landscape photography for more info. To plan an outing:
I think that today they are quite well known, and their use is easy. However, if anyone has any doubts about how to use them or would like to delve deeper into the subject, do not hesitate to write us in the comments.
Weather
For the weather, I only use two, and I’m going to talk a little about them. I will talk about the ones that I use because they work for me in a good percentage. They are not infallible, and they all fail sometimes.
- Windy: I use it as a general view, to understand how the clouds move and, very importantly, what distance they occupy on the horizon.
- Meteoblue: Thanks to its Astronomical Seeing, I see the probability that I have. It can be low, medium, and high clouds, and because of this, many times I decide to stay at home.
Why do I look at how much the clouds cover the horizon?
Simple, because of the curvature of the Earth. If we have an extension of clouds, we will not see the sun. When clouds enter the horizon, where our sun is going to set or rise, beyond about 200 km, it is possible that they cover the last rays. So will not color our clouds, giving those colors that we like so much.
As a final contribution to this data, flat Earthers who read this post, this does not matter…
Clothes & Photography Equipment
With everything clear, now it’s time to get ready to go to our session.
- Comfortable clothes. Don’t be in a hurry to get dirty or wet. Have remained that it’s possible that the access is tortuous and we have to “pose the ass” several times.
- We will bring the minimum essential equipment. especially if access is tedious or of considerable difficulty. In my case, with my camera, Nikon D850, and the lens 14-24 with a set of filters, is enough.
- Sturdy tripod. The more the better, it becomes uncomfortable, but it can be the difference between having and not having the photo. I highly recommend that this be made of carbon since this material does not transmit vibrations as aluminum does. Both on the coast, rivers, or windy places, it will avoid those micro trepidations that we only see when we get home on the computer.
- High rain boots. In my case, I use Decathlon ones, the cheapest they have; you don’t have to go for neoprene ones or anything like that. Better some boots before the famous wading, since this one. If a big wave catches us, it could fill with water and drag us out to sea, putting us in a complicated situation. In summer or hot places, I use some booties since the boots, being made of plastic, give off excessive heat.
- A large microfiber towel and several cloths. If the action is going and being with the water around our necks, our camera will get wet, and our lens and filters. It doesn’t matter if you have the best camera on the market or the worst; dry it, dry it often.
- If you have translucent or transparent shower caps. These will help you to have the lens without the cover, to be able to compose, and prevent the lens from getting wet before taking the shot.
If I insist so much on drying your equipment, it is because at the time of writing this article, my camera, a Nikon D850, is in a technical service performing a thorough cleaning and replacing parts that, due to the saltpeter, were not working properly. Clean your camera when you do seascape photography, and clean it well.
Tips before shooting seascapes
With our shooting planning studied and our equipment reviewed and prepared, we only have to go enjoy our session and come with those photos that we want on our memory card. But first of all, I would like to give some advice that although it seems obvious, it is not more to remember.
- First of all, tell your family in which area you are going to be. If you are going with someone who knows who they are or how to contact you if necessary.
- If the place you want to go to take the photos is a place with difficult access, or with complicated or exposed steps, it is better to be accompanied.
- The sea, like the mountain, looks very beautiful in the photos. But from personal experience, I can guarantee that both can be very cruel. It is very good that “I am the only one who has this photo” or “I am the first to go” (There will be no fishermen who will have gone). But it would not be better if more people had it and were able to comment on it later?
Those who know me know that I don’t usually pay attention to the latter…
Tips on the location
Once in place, the first thing I do is observe, and not look for a composition, if not the behavior of the waves, how far the waves reach, if there is any frequency, if there are exit points, etc…
I try to understand the sea in the place since not all of them behave the same. We have, for example, the Cantabrian Sea, where you will have a series of five waves that are frequently greater than the rest. And others, where it varies depending on the area of the island where you are.
For this reason, I usually arrive at the locations well in advance, long before dawn or dusk, to fully understand where I am.
Once all of the above is done, in my situation, I develop the session as in any other place. I look for a composition that is attractive to me and I wait for the moment of light to be right, having the correct exposure parameters planned for the result I am looking for, no more.
Basic settings for Seascape Photography
Depending on the type of result we want to obtain, we will opt for different values depending on the situation.
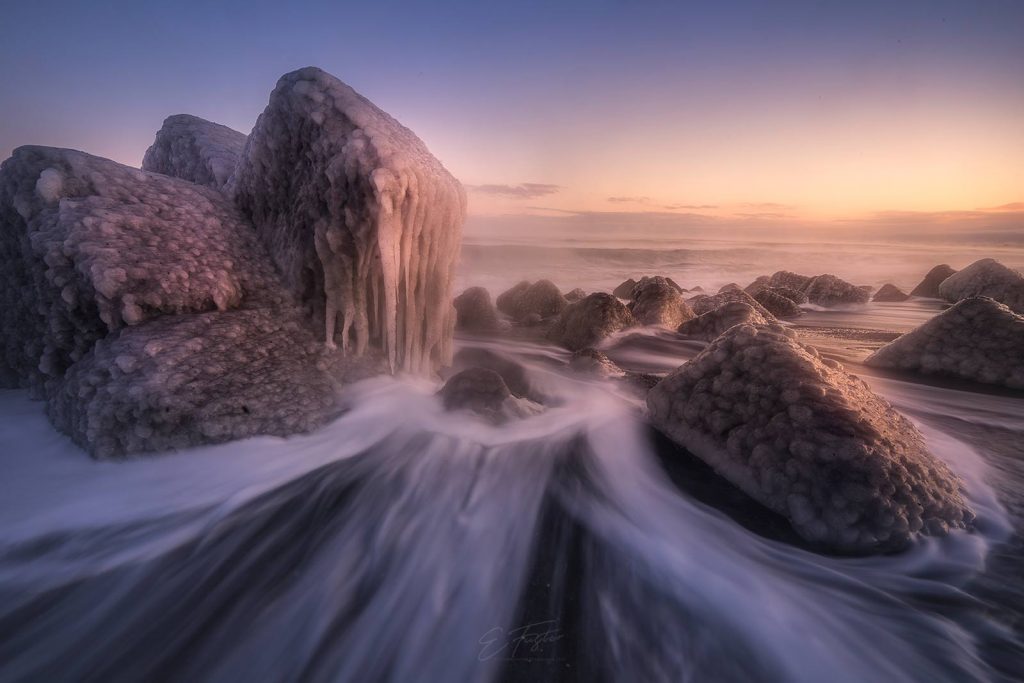
Silky Smooth Water Effects
To obtain defined silks we will have to move around 1/2 seconds. These shutter speeds will vary depending on the speed at which the water moves and the distance we are from it. The closer and faster the water hits, the faster our exposure speed can be.
However, we will have to lengthen it a bit the further we are from it and the slower it moves.
Achieve the silk effect
- Use apertures from f/8 to f/16
- Use rather low ISO values
- In the moments of greatest light intensity of the session, I use a 6-step ND.
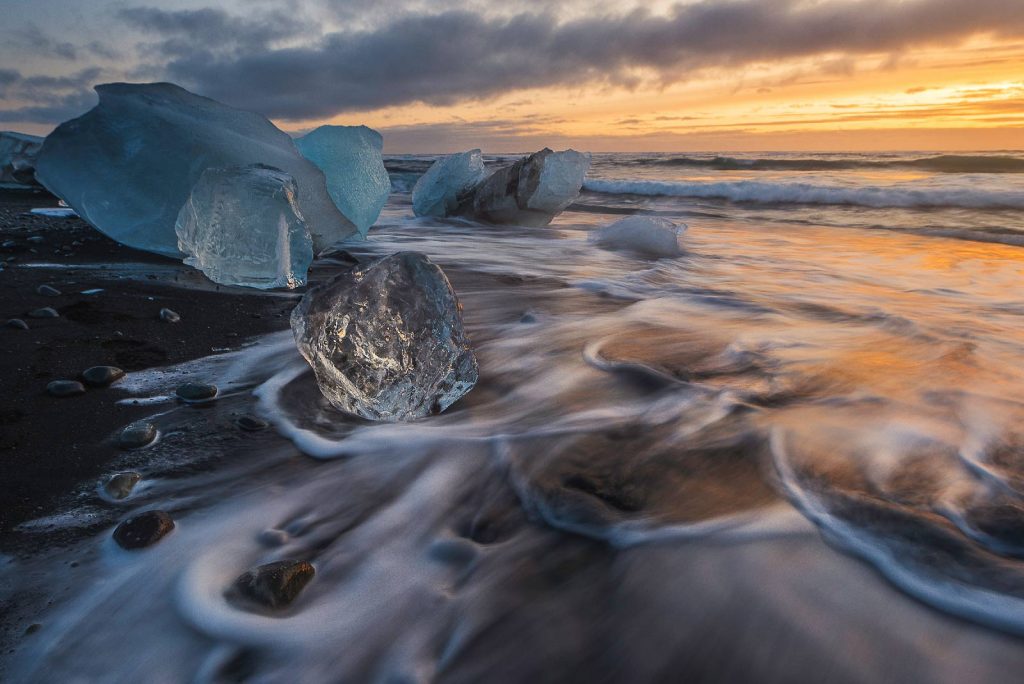
Achieve a smooth effect
If what we want is to give it that mystical and smooth appearance of a little sea, we will have to extend the exhibition as long as possible. Personally, I think that this should go beyond 1 minute, with 2 minutes necessary as a starting point.
To achieve this effect, we have two possibilities:
Use of filters
It is the classic, as has always been done, since it allows the exposure to be lengthened as much as possible. In my case, I have a 12-step that allows me to extend the exposure for several minutes. The final shutter speed will depend on the test shots to define how long the camera will be exposing. Here I work with higher values:
- The ISO between 100 and 400
- It will not be necessary to close the diaphragm so much, between f/7.1 and f/9
Multi-exposure
This is a feature that most digital cameras incorporate, Canon and Nikon at least. What this function does is “add photos,” basically. This result can also be obtained via Photoshop, but we will talk about it in another article.
With this function, what we achieve is to work with brighter filters or without them directly. Depending on the camera model we have, we will see on the Live View screen how our photo is generated. As an example, I will tell you that I use this function a lot:
- Use the lowest possible ISO values
- Highest aperture with guarantees (f/16)
- Use an exposure value that leaves the photo compensated; it is usually a few seconds without an ND filter.
In my particular case, I use both methods at the same time. The combined use of multi-exposure in conjunction with a 6-stop ND filter, which allows me to reach 30 seconds or more in a single shot, adds to the 10 shots that it allows me. Give me a result in RAW of a shot of more than 300 seconds.
Conclusions
And so far, my advice on how to plan a seascape photography session. I hope I have contributed or helped those who read this to advance in this discipline, and those who did not practice it start.