The camera aperture is one of the most important setting options on your camera. If you understand and master the aperture, photography is much more fun. So let’s get started right away.
In this post you will learn, among other things:
- How to blur the background of your subject.
- How the aperture is related to the exposure time.
- How to set the aperture and use it for your photos.
We will first define the term aperture for you and explain its function as simply as possible. Don’t let that put you off if you don’t understand everything right away.
With every sentence here everything becomes a little clearer and after you’ve tried it out, hopefully, there are no more questions. So, it’s best to take your camera with you right away.
A small preliminary remark for a basic understanding:
There are two basic ways in which you can influence the exposure of your photo. One of them is the aperture, which is described in this lesson.
The second setting is the shutter speed, which is the length of time your picture is exposed. The longer the shutter speed, the more light falls on the sensor. We’ll cover shutter speed in more detail in the next lesson. For this lesson, all you need to do is know that the shutter speed is there.
Camera aperture: a brief definition
The camera aperture is the back opening of your lens. You can regulate the size of this opening yourself and thus determine how much light hits the camera’s sensor.
The size of the opening is indicated by the f-number. When a photographer talks about the f-number that he used for a particular picture, he uses numbers like f/1.8, f/2.8, f/5.6.
The interesting thing now is: the higher the number behind the f/, the smaller the aperture. And vice versa: the smaller the f-number, the larger the aperture.
Take a look at the following picture. You can see that there.
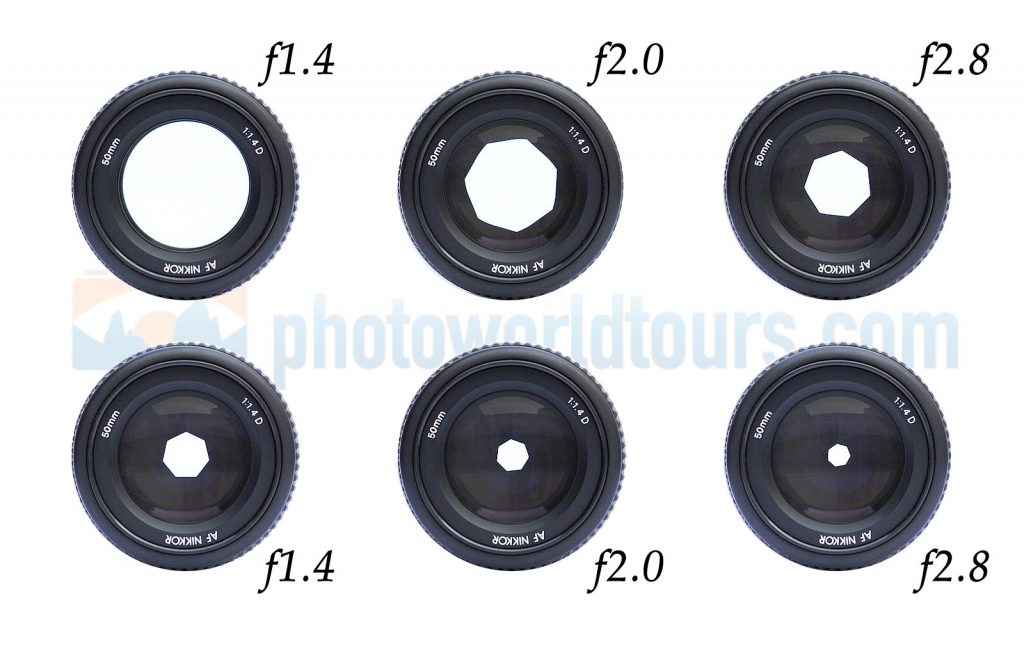
So if you set f/4, a lot of light hits the sensor of your camera, and if you set f/13, very little light hits the sensor.
We’ll explain what this is good for later and then try it out in practice. Then we can also see where the differences are in photos with different f-numbers.
But first, we have to work our way through the theory briefly. Do not give up! It’ll all make sense in a moment. So, back to the f-number.
Burn this phrase into your brain: The smaller the number behind f /, the more light hits the sensor in your camera:
A small number, large opening, lots of light – a large number, small opening, little light!
If that sounds illogical to you, just think of the numbers after the f as a fraction. If we asked you if 1/16 (one-sixteenth) is greater than 1/8, what would your answer be? No! I agree. Just because the number 16 is larger, 1/16 is not more than 1/8. So: f/16 is smaller than f/8. f/16 lets in less light than f/8.
Say it out loud to yourself again: small number, a lot of light – large number, little light!
Ok, take a quick deep breath. Go on.
This is a typical row of bezels:

Which numbers you can set depends on your camera and above all on your lens. So it is normal if the setting on your camera starts with a different f-number or if you have f-numbers between the ones mentioned here.
Our standard lens has no small f-numbers like f/1.4, f/2.0, and f/2.8. It only starts at an aperture of f/3.5.
Additional knowledge: f-stops
If you want to go a little deeper into the theory, then the additional knowledge on the subject off-stops is interesting for you. For a basic understanding of the camera aperture, you do not necessarily need it and you can skip it first and dedicate yourself directly to the practice in the following section.
Are you still there? Very well. Let’s give an example to understand better.
The individual steps between two values are called f-stops. So if you reduce your camera aperture from f/4 to f/5.6, for example, this is a difference from one f-stop.
With every full f-stop, the sensor of your camera gets twice or half as much light.
Did you know already?
With an aperture of f/4.0 your sensor reaches twice as much light as with an aperture of f/5.6, but only half as much as with an aperture of f/2.8.
If you’ve experimented a little with the camera aperture, you may have noticed that your camera has more aperture stops than those. Perhaps you can set an aperture of f/3.5 or an aperture of f/7.1 on your camera, for example.
The reason for this is that there are also half f-stops and third-f-stops. As a rule, you can determine in the menu of your camera whether you want to work with half or third f-stops.
So you have more than just the full f-stops available. Of course, that doesn’t change the relationship between the f-stops and the amount of light that falls on your sensor.
In the following two graphics you can see the respective camera aperture rows with half and third steps, whereby the entire aperture steps are marked in bold.


Which of the two f-stops you use is entirely up to you. It’s best to try both of them and see which one you get along with best. We have set an aperture stop of one third on our cameras because this gives us the greatest flexibility when taking photos.
How set the aperture on your camera
Enough theory, now let’s try out how you can use the camera aperture in practice. The best thing to do is to have your camera on hand.
The mode A
Each camera has different modes. The modes M, A, S, and P are usually always included. With some cameras, the modes are called M, Av, Tv, and P. To try out the camera aperture in practice, set the camera to mode A or Av. The abbreviation A stands for Aperture, the English word for aperture.
In mode A you can set your f-number manually. So you can decide for yourself how much light you let on the sensor.
In mode A, your camera automatically ensures that the shutter speed that matches your selected camera aperture is selected so that your image is always correctly exposed.
Mode A is also often called aperture priority.
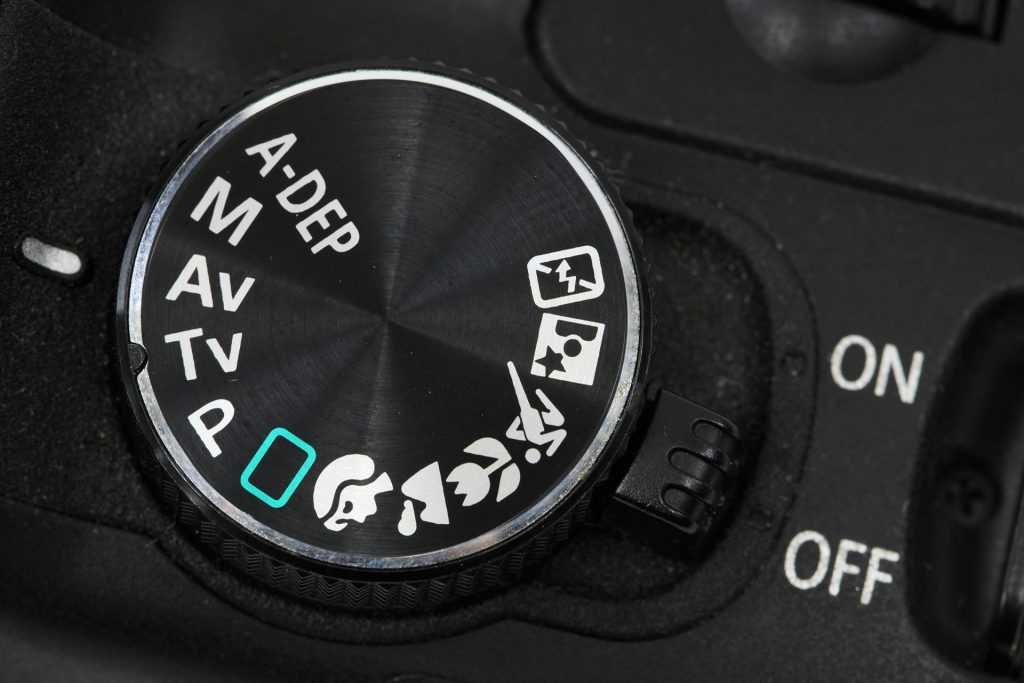
If you are at the very beginning, you might be wondering what the shutter speed is doing here. Please don’t worry about it for now.
The camera does that automatically for you in mode A. We will now concentrate solely on the f-number and mode A. We will take a closer look at the shutter speed in the next lesson.
If you have now set your camera to mode A, you can set the camera aperture number with which you take your photo in the next step.
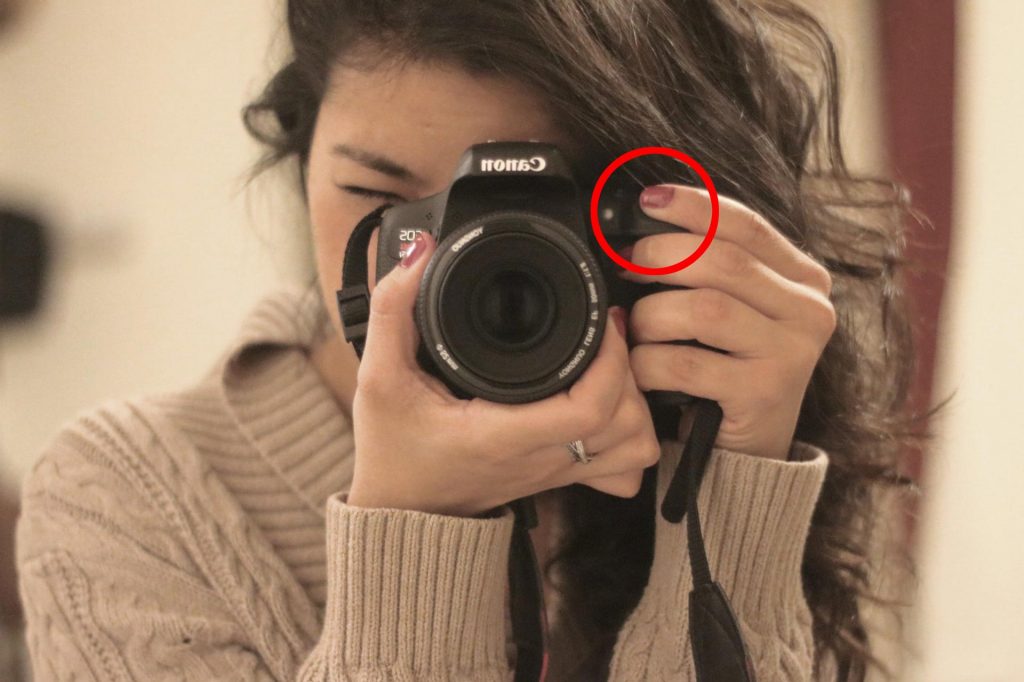
On many cameras, you control the camera aperture number using a wheel on the front right of the camera. If you can’t find exactly where to control the iris on your camera, just check your manual.
To see which aperture number you have set, you have to look through the viewfinder or at your display, depending on the type of camera. There you will find the f-number with the f/ at the beginning.
How to use the aperture for your photos
Now let’s look at how you can use the camera aperture for yourself and your photos.
Using the camera aperture: # 1 Taking pictures in low light
We already mentioned that the camera aperture determines how much light falls on your camera’s sensor. As a reminder: large opening, lots of light – small opening, little light.
In poor lighting conditions, you have the option of opening your aperture wide and still allowing enough light to reach the sensor to get a correctly exposed photo.
We’ll cover shutter speed, manual exposure, and ISO in the coming lessons. When you know all of these terms and understand how they are related, a lot becomes clearer.
At this point, it is sufficient that you know that a large aperture can help you to take photos in poor light conditions.
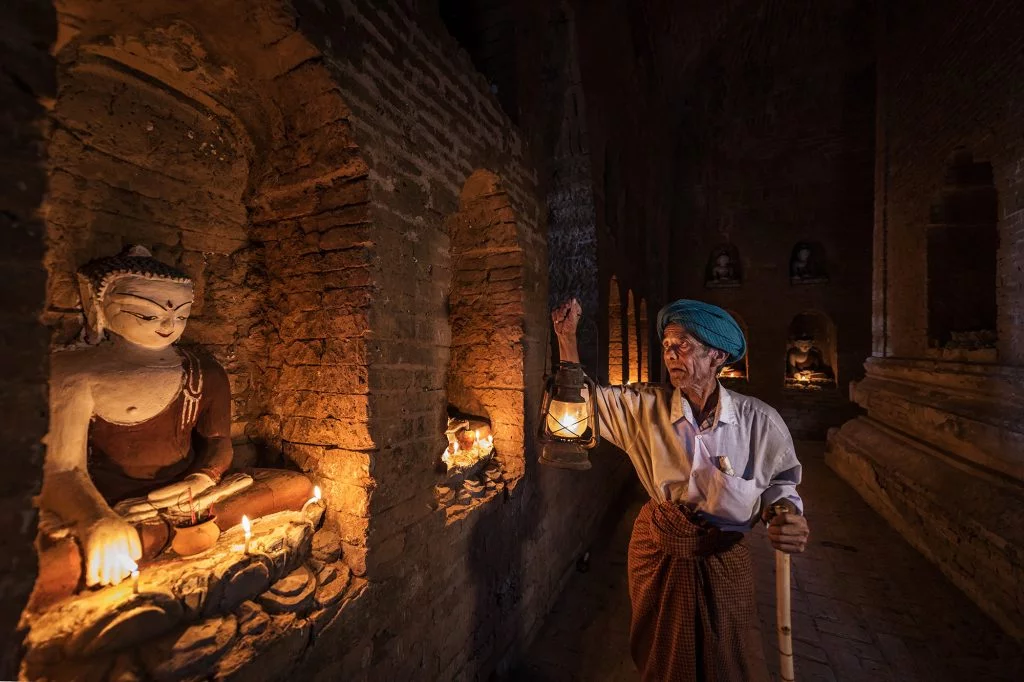
For example, the following picture was taken in very poor lighting conditions. It was already dark outside and the scene was only lit by a lot of lanterns, which didn’t give off a lot of light. So in this situation, we opened the aperture wide to still be able to take a photo.
Using the camera aperture: # 2 Depth of field or blurred background
You don’t just use the camera aperture to determine how much light you let into your camera. By changing the aperture you also have a very important stylistic device in your hand: the depth of field. With the choice of your f-number, you determine whether the background of your main subject is razor-sharp or blurred.
You have probably seen photos many times in which a person can be seen razor-sharp, but the background is indistinct and blurry. You can achieve exactly this effect by using the camera aperture.
Of course we also have such photos. We picked out two of them for you. There you can see that the focus is on the face and the background is out of focus.
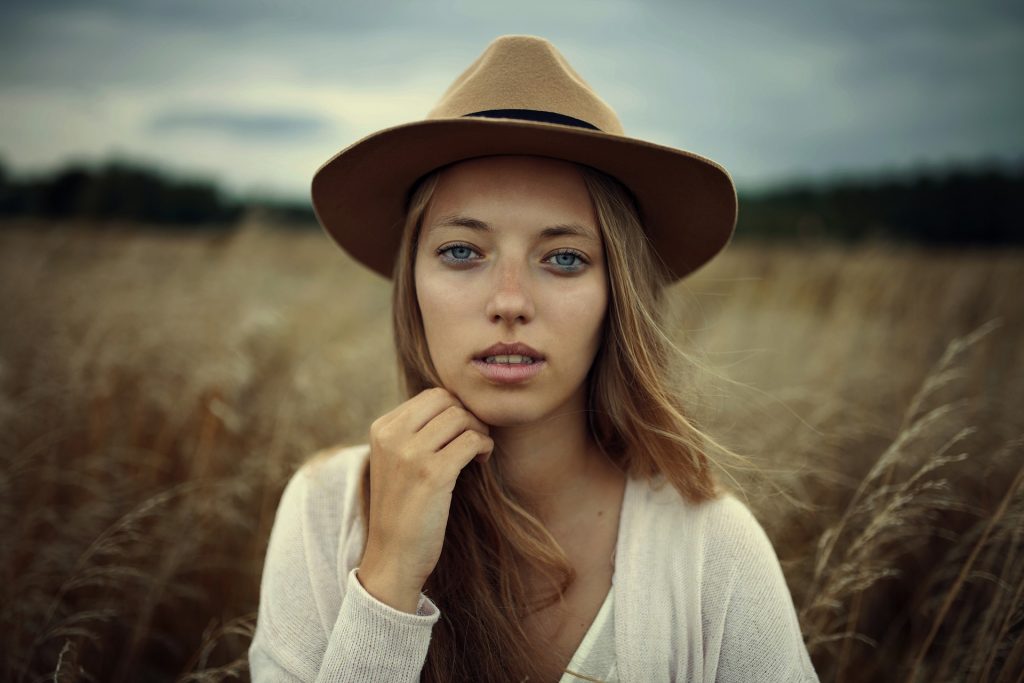

Of course, you can also achieve the opposite effect by adjusting your camera aperture. By closing the aperture very far, choosing a large f-number, you can achieve a very high depth of field. Instead of a blurry background, then all elements of your image will be in focus.
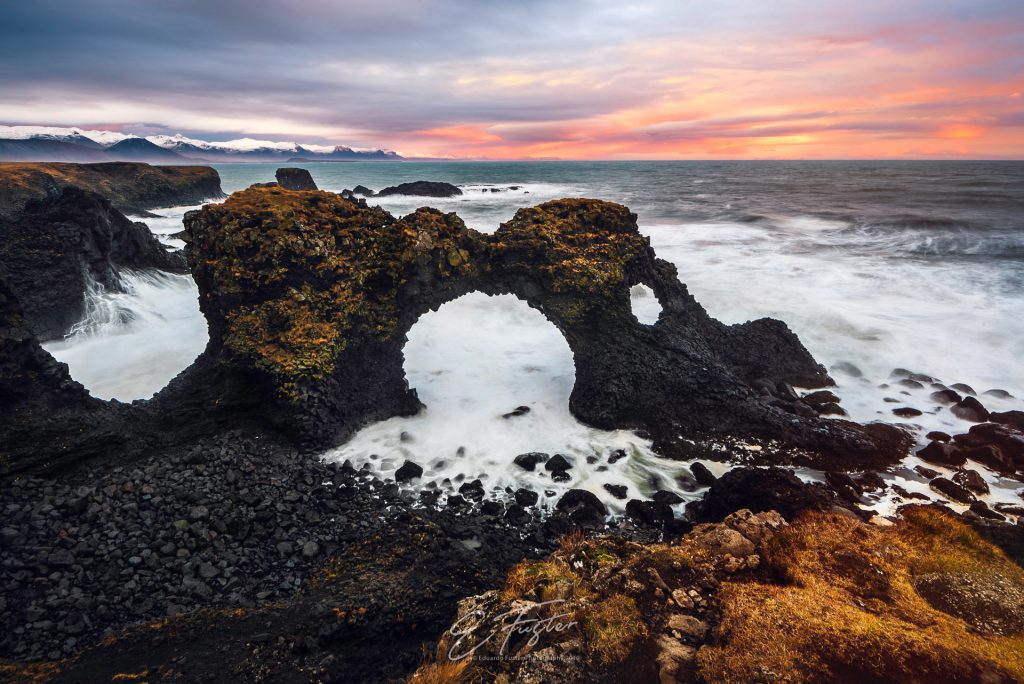
The following picture was taken with an aperture of f / 11 and has a high depth of field.

Our sample photos already gave you a first impression of how the camera aperture affects the depth of field.
Now let’s look at this again using a practical example. We drew you a little something for this.
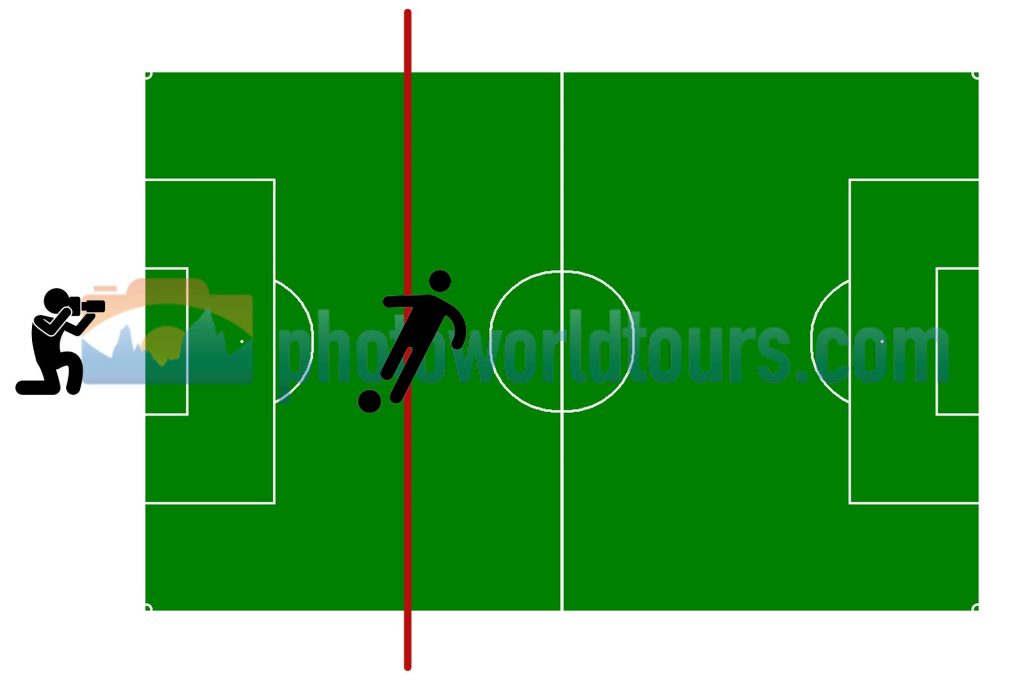
The first picture shows the initial situation: You are standing at the end of a soccer field and would like to photograph a soccer player. So that the scenario is also interesting for non-soccer fans, we of course choose a particularly photogenic soccer player: Mats Hummels.
So you stand on the edge of the field with your camera at the ready and focus on Mats Hummels.
This situation is shown in the first picture. The red line shows your focal plane.
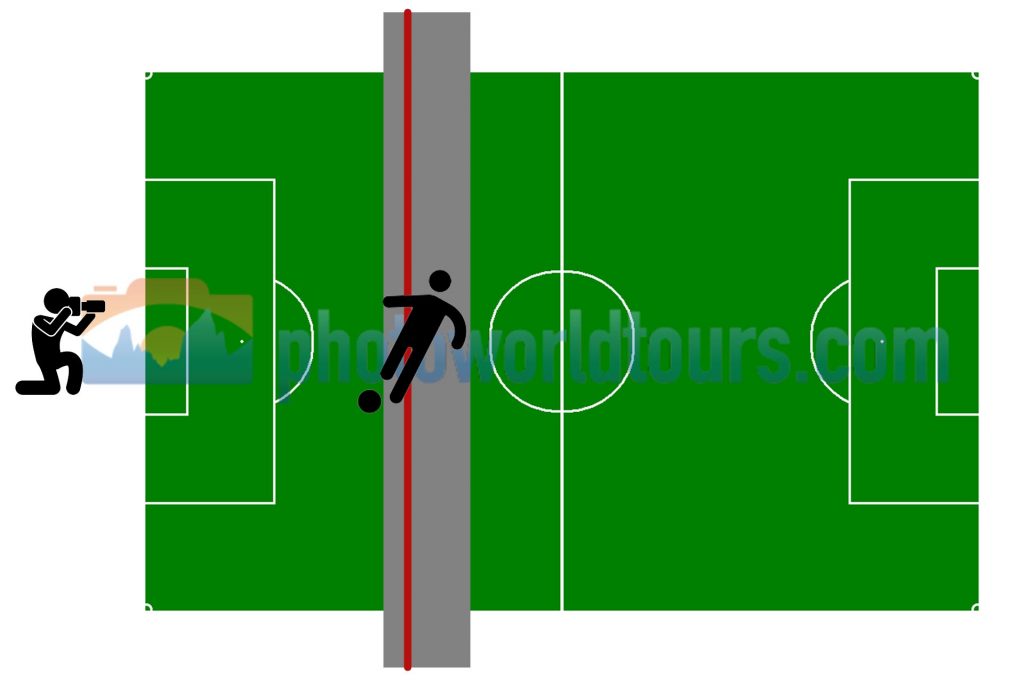
Your camera is now set to mode A and you now set the aperture to f/2.8 (so wide open and lots of light). We see this situation in the next picture. The football player and everything in the gray area is sharp. The rest of the soccer field is blurry.
So we have achieved exactly the effect that we saw in our first example image above. The football player face is in focus, the background is out of focus. The goalkeeper in the opposing goal would be seen as only shadowy.
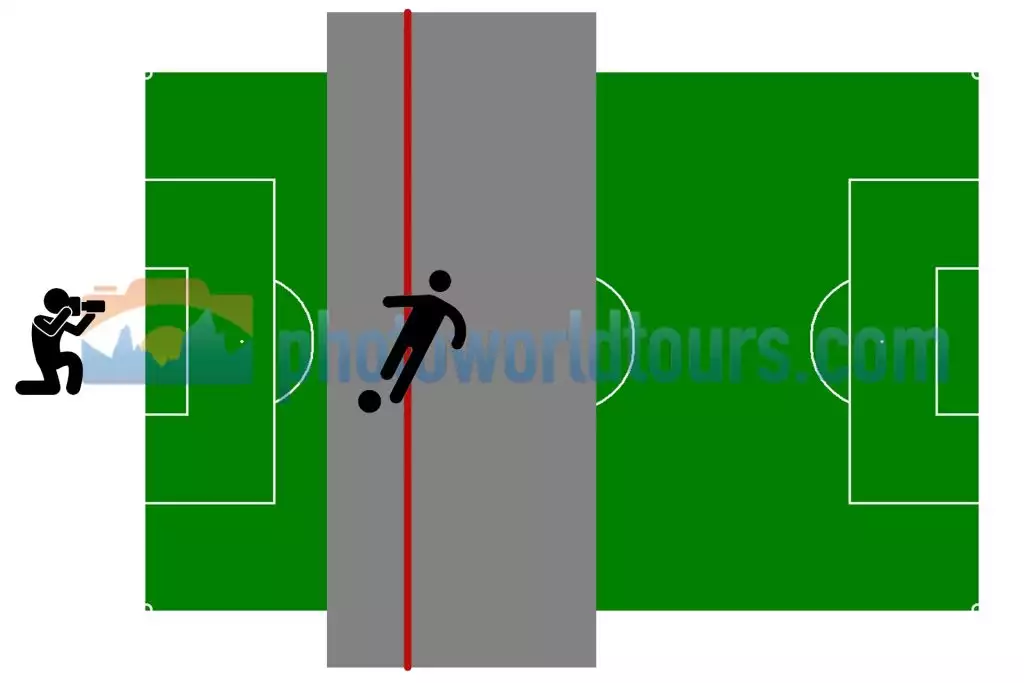
But now we want to try to show the goalkeeper at the right gate. So you increase the f-number to f/8 (the camera aperture closes, less light enters). Now the area behind the football player has become a bit clearer, but we still don’t see the Goal Keeper.
So that’s not enough for us. Now let’s overdo it and increase the f-number to f/22 (the aperture is almost closed and very little light comes through).
As we can now see in the picture below, we have not only focused on the football player & goalkeeper in the goal but the entire field of play.
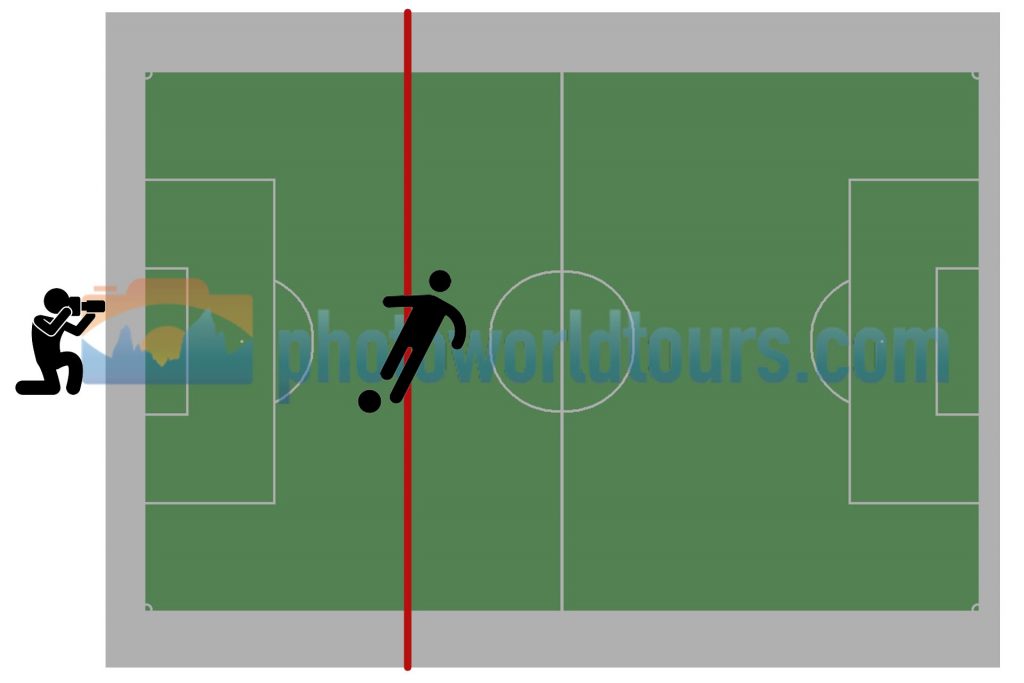
As you can see, the f-number doesn’t just have an effect on the background. The area in front of your focused subject also becomes sharper or blurred if you change the camera aperture.
Caution: We have chosen the example with the aperture of f/22 only for illustrative reasons. We usually take pictures with a maximum camera aperture of f/13. At higher f-numbers, many lenses become blurred again for technical reasons, which is why you should not set this value too high.
After this somewhat abstract example, we want to show you again with real photos. The pictures themselves are not masterpieces, it’s really just about showing the relationship between aperture, depth of field, and level of focus:
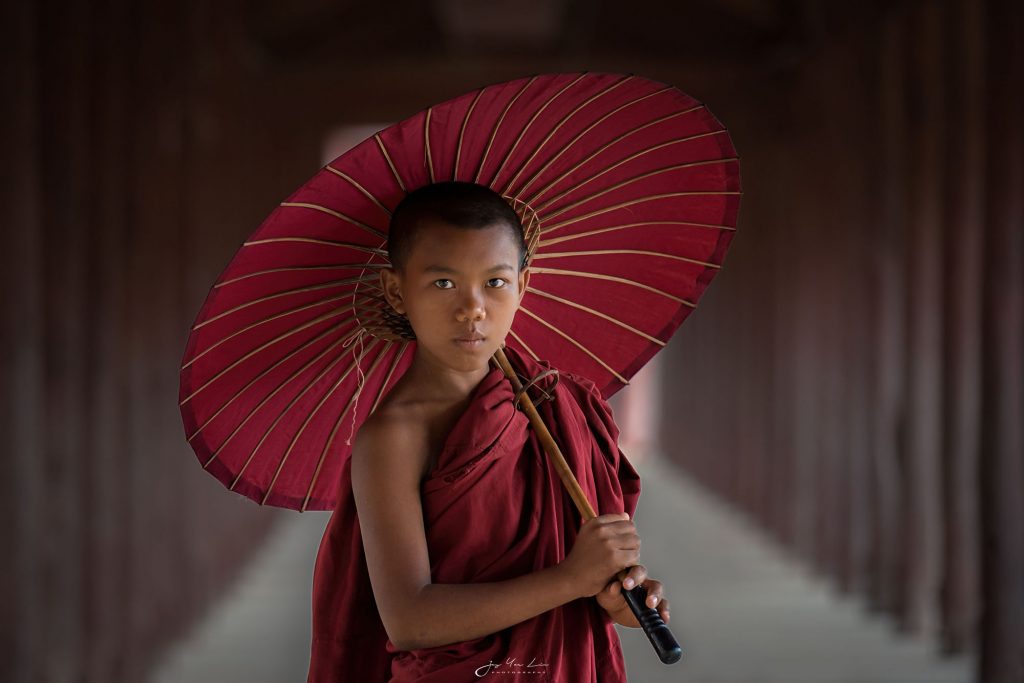

You can also reproduce this effect with your eye. Hold your hand about 8 inches in front of your face and focus your gaze on your fingers. You can tell your fingers are sharp and the background is blurry, right?
Now focus your eyes on an object in the background. Now you can see that your hand is blurry and the background is sharp. So it always depends on what you focus on. It’s exactly the same with your camera.
Which camera aperture is best?
Now, of course, the question arises as to which situation you should shoot with which camera aperture. To be honest, that’s a matter of taste. Nevertheless, we would like to give you a brief guide to which aperture values can be useful for which situation.
A shallow depth of field is always recommended if you want to focus on your main subject through a blurred background. This is the case, for example, with portraits. You can achieve a shallow depth of field with small f-stops between f/1.8 – f/4. There are even lenses that reach f/1.4 and lower. But they are usually very expensive.
You want to achieve a lot of depth of field, for example, with landscape photos, so that the landscape looks as true as possible in the photo. If you look at a landscape with your eyes, the foreground, the middle distance and the background are also sharp (unless you left your visual aids at home).
In landscape photography, it is therefore advisable to take pictures with the aperture closed. We mean f-stops of, for example, f/11 or f/13.
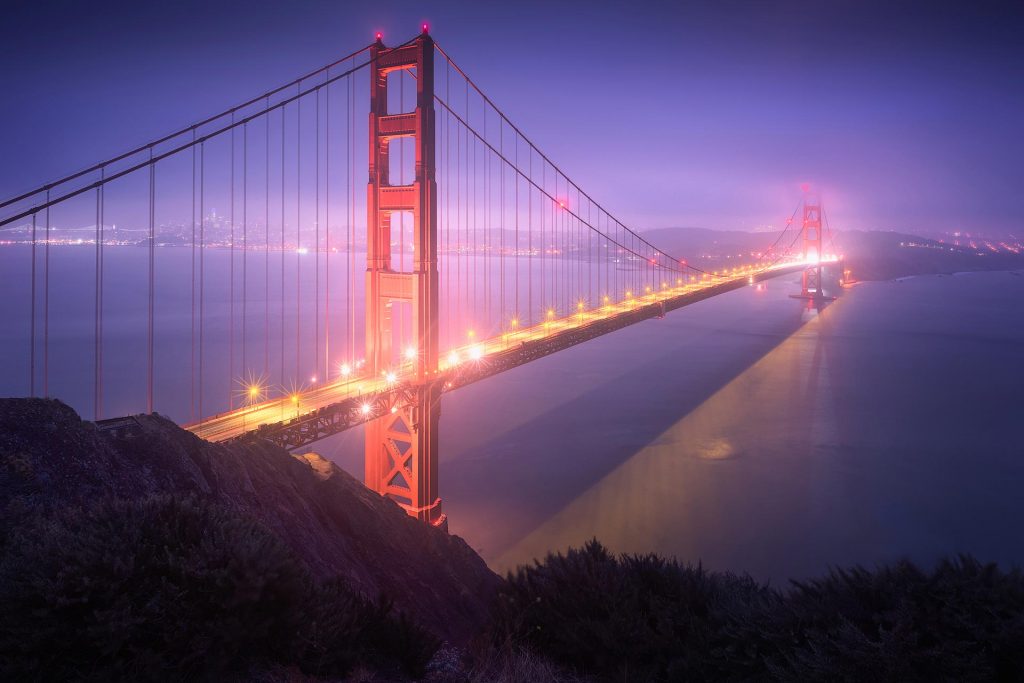
But as we said above, it’s all a matter of taste. Imagine z. For example, suppose you walk through the Sahara and suddenly see a beautiful red rose. Pretty unlikely, but who knows.
Now the Sahara sand is somehow not that cool and so you just want to focus on the rose. So you open the aperture completely (e.g. f/2.8) and only focus on the flower. This has the advantage that the beautiful rose is sharp, but the not so beautiful sand is blurry.
Now imagine, the sand is so dry that great cracks have formed in the sand and in the middle of it this beautiful red rose is blooming. In this case the sand would be a great feature and could give your picture the final kick. So you want both the rose and your background to be sharp and therefore photograph the image with the aperture as closed as possible (e.g. f/11).
But be careful: You might now be tempted to close your aperture extremely far in order to get the greatest possible sharpness in your picture. Unfortunately, this usually doesn’t work. The depth of field actually increases the further you close the aperture. At the same time, however, the general sharpness of the images decreases again from a certain f-number.
Our tip: Avoid f-stops that are too large to avoid blurry photos. At f/16 at the latest, it becomes critical with many lenses. An aperture of f/22 often reduces the sharpness of the entire photo significantly.
Exceptions confirm the rule as always. If you have some time, just take your camera and put it on a tripod. Now you simply take several photos of the same motif and always choose a different aperture.
Afterwards you look at the pictures and you can find out at which aperture your lens achieves the greatest sharpness and from which number your pictures become blurred. This will tell you exactly how far you can go with your lens.
Again briefly summarized
Open aperture → f/1.8 or f/3.5 → Shallow depth of field → in portraits and all situations in which you only want to focus on your main subject and the background should be blurred.
Closed aperture → f/11 or f/13 → high depth of field → in landscape photography, or architectural photography and all situations in which you want your picture to be sharp from foreground to background.
Additional knowledge: Full control over the depth of field
The aperture is actually just one of three factors that you can use to influence or control the depth of field in your image. This will become even clearer in the coming lessons, but for the sake of completeness we want to mention it here.
Therefore, at this point we make a little digression on the subject of depth of field. If you only want to deal with the aperture at first, you can skip this part and read it through later.
So here are all the factors at a glance that have an influence on the depth of field:
- The aperture
- The focal length of your lens (wide angle vs. telephoto lens)
- The distance from your camera to your subject
We have already clarified the connection between aperture and depth of field. Now let’s look at the other two factors.
Keyword: focal length
We’ll cover the focal length in one of the next lessons. To understand this section, a really, really short explanation: The focal length corresponds to the zoom of your camera: short focal length = little zoom = wide angle and long focal length = a lot of zoom = telephoto lens.
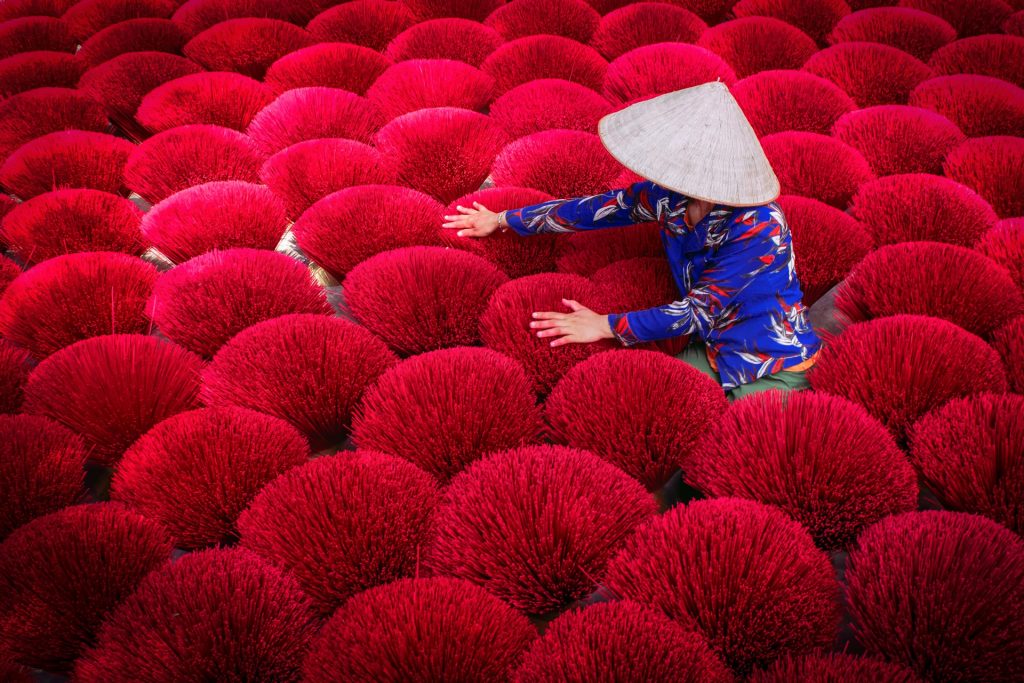
If you take photos with a wide-angle lens, you still have a lot of depth of field in the picture even with a wide aperture. The following picture was taken with a relatively wide-open aperture of f/4,0.
However, since it was photographed with a short focal length of 18 mm and the distance to the subject was relatively large (see next point), this photo still has a relatively high depth of field.
But if you take photos with a telephoto lens, it’s the other way around. Even if you take photos with an aperture that is already quite closed, you will still have a relatively shallow depth of field in the image.
You can see that very well in the next picture. Even though it was shot with a relatively closed aperture of f/8, the background is out of focus. This is because it was taken with a very long focal length of 300 mm, i.e. a very large zoom.

Keyword: distance subject / lens
If you take a portrait photo and your model is half a meter away from you, the background will be very blurred. If you now take a big step back and take another photo with the same settings, the depth of field is no longer that shallow.
As you can see, it is not just the aperture that is responsible for the depth of field.
Practical tasks
So. Now let’s try the whole thing. We hope you have your camera on hand. You need that.
What you need for the first practical attempts:
- Your camera
- Your camera’s manual if you’re not sure how to change the f-number on your camera
- A motive. Maybe you have a little cuddly toy or something that can serve as a model.
You can easily do the first exercises at home.
Make sure you have plenty of light available. This also applies to photos in your apartment. The best thing to do is to turn on all the lights you have available.
After you have switched the camera on, set the dial to aperture priority – mode A (or Av on some cameras). If you look through the viewfinder or at your display, you will see several numbers glowing at the bottom. One of them should have an f in front of it. Found? That is the f-number.
Now you look through the viewfinder and focus on your subject. To set the f-number, you always have to press the shutter button briefly and focus on your subject. Then you can change the f-number using the wheel.
# 1 Familiarize yourself with setting the aperture on the camera
Setting the f-number depends a little on which camera you have. Trying it out usually helps. Often there is a small wheel on the front right of the camera. This allows you to change the f-number.
If you don’t have this cog, just try which cog changes the f-number for you or, if necessary, just look at the manual. Found? Fine! You have already successfully passed the first task!
# 2 Discover the power of camera aperture adjustment
So now it’s time to take pictures. Just find a motif and photograph it with different f-stops.
Try out the entire range of the aperture, including very wide and very wide apertures. Do you see how your subject and the background change?
If you choose very large f-numbers, you will likely need to place the camera on a tripod or on the table. Since very little light falls on the sensor through the very small aperture, your camera tries to compensate for this with a slow shutter speed, which can blur your pictures. You will learn more about shutter speed in the next lesson.
# 3 Play with depth of field
Once you have familiarized yourself with the setting of the camera aperture on your camera, try to use the depth of field deliberately for your pictures. Choose the largest possible aperture of your lens (smallest f-number) and look for subjects that look good with a blurred background.
Photograph the subject from different distances and see how this affects your background.
Did you understand the aperture? Excellent! That is a very big step on the way to learning photography. In the next lesson, we’ll look at shutter speed, the second very important setting on your camera.


