Chromatic Aberration: What is it and How to Avoid it
Chromatic aberration is a common optical problem that can ruin a perfect shot, especially during travels where we capture high-contrast landscapes and scenes. Here, we explain what it is, how to detect it, and most importantly, how to correct it so your travel photos are stunning.

What is chromatic aberration?
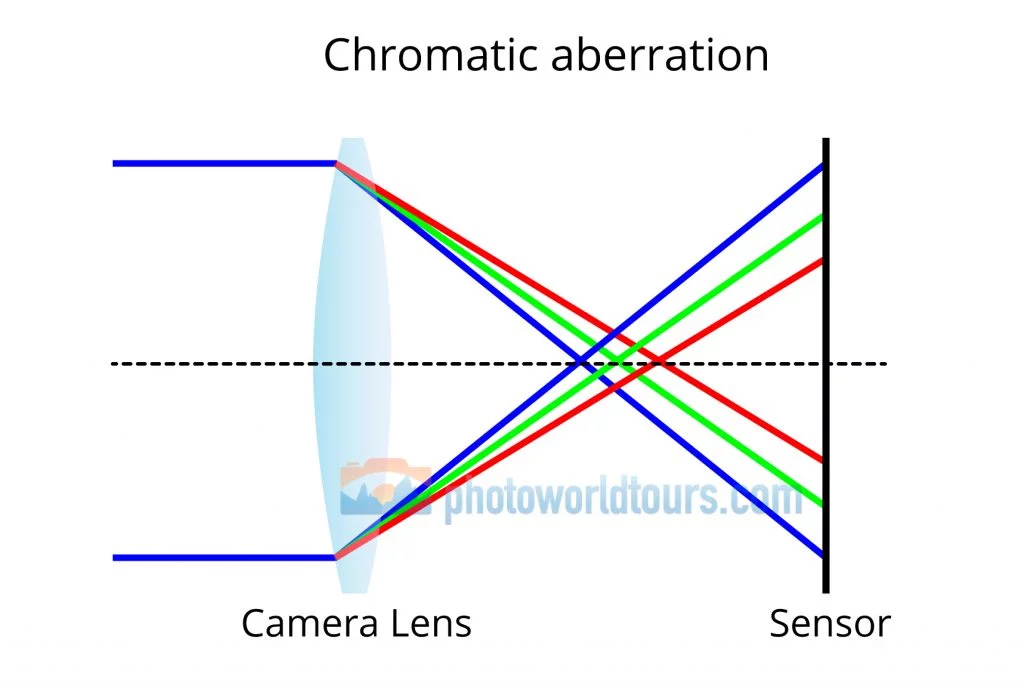
Chromatic aberration, also known as color fringing or purple fringing, is an optical defect that occurs when a lens fails to focus all colors to the same point. This happens because lenses have different refractive indices for different wavelengths of light. As a result, each color wavelength focuses at a slightly different point, creating colored edges around objects in the image. This is particularly noticeable in high-contrast areas, such as the edges of buildings against the sky or tree branches against a bright background.

Types of Chromatic Aberration
There are two main types of chromatic aberration:
- Longitudinal Chromatic Aberration (LoCA):
- Occurs when different wavelengths of light focus at different distances along the lens axis.
- Results in color fringing in both the foreground and background of the image.
- Most noticeable in high-contrast areas when shooting at wide apertures.
- Lateral Chromatic Aberration (LaCA):
- Occurs when different wavelengths of light focus at different positions on the image plane.
- Results in color fringing at the edges of the image, where different colors are misaligned.
- More common in wide-angle lenses and can be present at all apertures.

How to Detect Chromatic Aberration
Detecting chromatic aberration is relatively simple:
- High-contrast edges: Look at areas where light and dark colors meet. If you see color fringes along the edges, chromatic aberration is likely present.
- Zoom in: Magnify the image in your photo editor and examine the edges of objects. The color fringes become more evident when zoomed in.
- Foreground and Background Check: For longitudinal chromatic aberration, check both the foreground and background for any colored halos or fringes.
Visual Examples
To help you identify chromatic aberration, here are some visual examples:
- Before: Notice the purple and green fringes around the edges of the tree branches against the bright sky.
- After: The color fringes have been removed, resulting in a cleaner and more natural look.
How to Correct Chromatic Aberration
Fortunately, chromatic aberration can be easily corrected with photo editing tools. Here’s how to do it in the most popular programs. For additional tools and recommendations, check out our Best Apps for Photographers guide.
Adobe Lightroom

- Import your photo into Lightroom.
- Go to the Develop module.
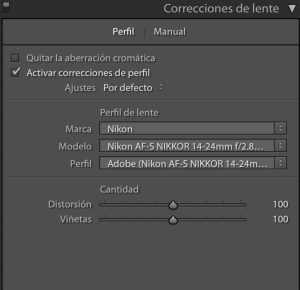
- In the Lens Corrections panel, enable the “Remove Chromatic Aberration” option.
- Use the Manual tab: If the automatic correction isn’t enough, switch to the Manual tab and use the Defringe sliders to target specific colors.
- Purple Amount: Adjust to reduce purple fringing.
- Green Amount: Adjust to reduce green fringing.
- Fine-tuning: Use the color picker tool to select and reduce specific fringe colors that may still be present.
Adobe Photoshop

- Open your image in Photoshop.
- Duplicate the original layer (Ctrl+J or Cmd+J).
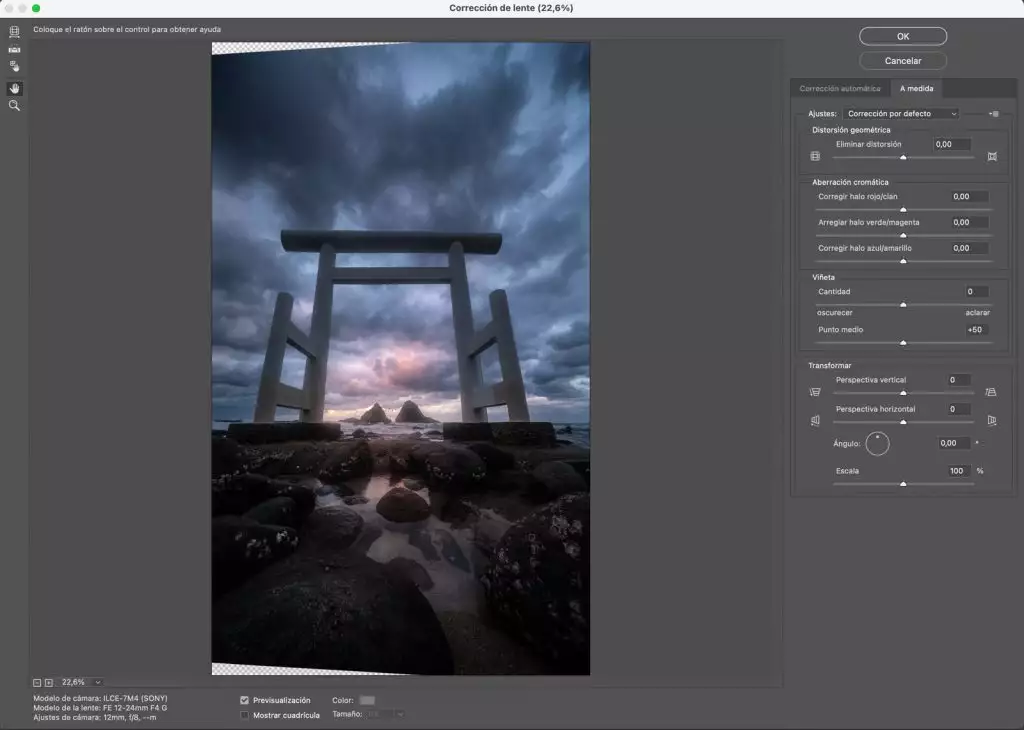
- Go to Filter > Lens Correction.
- In the “Custom” tab, adjust the chromatic aberration sliders:
- Red/Cyan Fringe: Adjust to correct red and cyan fringes.
- Blue/Yellow Fringe: Adjust to correct blue and yellow fringes.
- Fine-tuning: Use layer masks to selectively apply corrections to affected areas without altering the entire image.
Capture One

- Import your photo into Capture One.
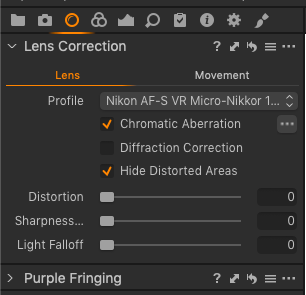
- Go to the Lens Correction tab.
- Enable the “Remove Chromatic Aberration” option.
- Fine-tune the correction:
- Use the Purple Fringing and Green Fringing sliders to adjust the correction.
- Analyze the image at 100% zoom to ensure accurate correction.
- Lens Profile: Make sure you are using the correct lens profile for automatic corrections tailored to your specific lens.
Tips to Prevent Chromatic Aberration
While it’s easy to correct, it’s better to prevent chromatic aberration from the start. Here are some tips to minimize it. If you’re planning to photograph challenging scenes like the Northern Lights, our Northern Lights Photo Tours page has valuable tips.
- Use high-quality lenses: Lenses with Extra-low Dispersion (ED) elements or Aspherical (AS) elements are designed to minimize chromatic aberration. Investing in high-quality lenses can significantly reduce this issue.
- Adjust the aperture: Shoot with an intermediate aperture (f/5.6 to f/8) to reduce chromatic aberration. Avoid shooting wide open, especially in high-contrast scenes.
- Avoid high-contrast situations: Whenever possible, avoid scenes with extreme differences between lights and shadows. If unavoidable, try to recompose the shot to minimize high-contrast edges.
- Use lens hoods: Lens hoods can help reduce flare and unwanted light entering the lens, which can exacerbate chromatic aberration.
Conclusion
Chromatic aberration can be a minor inconvenience, but with these tools and techniques, you can easily correct it and ensure your travel photos are impressive. For high-contrast landscapes, such as those in Scotland, refer to our Best Photography Locations in Scotland guide for inspiration and tips.”
Happy shooting and enjoy capturing your travels with clarity and precision!


